NOTE:Laravel version 5.7 has introduced out of the box Email Verification and account activation. If you are using Laravel version >= 5.7, Please use the inbuilt code for email verification. Tutorial here -> User Email Verification in Laravel 5.7
In this article we will cover on how to verify user’s email and activate the user account once they clicks on the account activation link sent in the email.
Before proceeding make sure you have the following ready.
Now Follow the very simple steps to make the verification system work.
Generate New Model and Migration for VerifyUser
We will be creating a new table in our database which will hold the verification / activation code that are appended in the URL and sent to the users. Let’s begin by generating the required Model and Migration file.
Use coupon 5balloons on this Cloudways Affiliate URL to get special discount.
php artisan make:model VerifyUser -mRunning the above command in your project root on terminal will generate a Model class VerifyUser.php in the App folder, and since we have appened the command with -m option, this will also generate a migration file for our new table verify_users under database > migrations folder.
Modify the migration files and migrate tables.
Now let’s modify the newly created migration file create_verify_users_table.php to include the required fields.
public function up()
    {
        Schema::create('verify_users', function (Blueprint $table) {
            $table->integer('user_id');
            $table->string('token');
            $table->timestamps();
        });
    }
Note that user_id will be the foreign key of primary key from the users table.
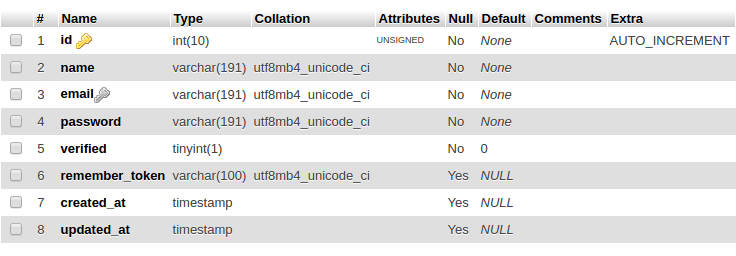
Also modify the migration file for the users table to include a new boolean field to maintain the status of account verification.
$table->boolean('verified')->default(false);Once you are done with the migration, you can run the migrate command to create / modify your database tables.
php artisan migrate:refreshWith this, you should have the verify_users table created in your database with following structure.

and the users table should have been modified, and have following structure.
Define Eloquent Relations
We now have our tables ready and we also have Models created for those tables. Let’s now go ahead and specify the one-to-one relationship between User and VerifyUser Model.
Add following method to the User.php Model class
    public function verifyUser()
    {
        return $this->hasOne('App\VerifyUser');
    }
Add following method to the VerifyUser.php Model class
class VerifyUser extends Model
{
    protected $guarded = [];

    public function user()
    {
        return $this->belongsTo('App\User', 'user_id');
    }

}
Send Verification Email on Registration
To send email’s make sure you have your mail properties set up in .env file of your project. Read Laravel Send Email Example
In Laravel all the emails sent by your application must be defined by a Mailable class. To generate one such class for our verify user’s email on registration. Let’s generate a class with artisan command. Run the given below command in your project root.
php artisan make:mail VerifyMailAs this command is executed, A new Class named VerifyMail.php will be generated under App/Mail. This class will have a build method which defines which view file to send as email.
<?php

namespace App\Mail;

use Illuminate\Bus\Queueable;
use Illuminate\Mail\Mailable;
use Illuminate\Queue\SerializesModels;
use Illuminate\Contracts\Queue\ShouldQueue;

class VerifyMail extends Mailable
{
    use Queueable, SerializesModels;

    public $user;
    /**
     * Create a new message instance.
     *
     * @return void
     */
    public function __construct($user)
    {
        $this->user = $user;
    }

    /**
     * Build the message.
     *
     * @return $this
     */
    public function build()
    {
        return $this->view('emails.verifyUser');
    }
}
We have modified the name of view files as emails.welcome. We will create a emails folder under resources/views in which we will keep our email views. Also as you can see we have declared the $user as public and we are setting the variable in the constructor.
Whatever variables are declared as public are by default available in the view file. Thus we can directly refer to the $uservariable to get the user related data directly in the view file.
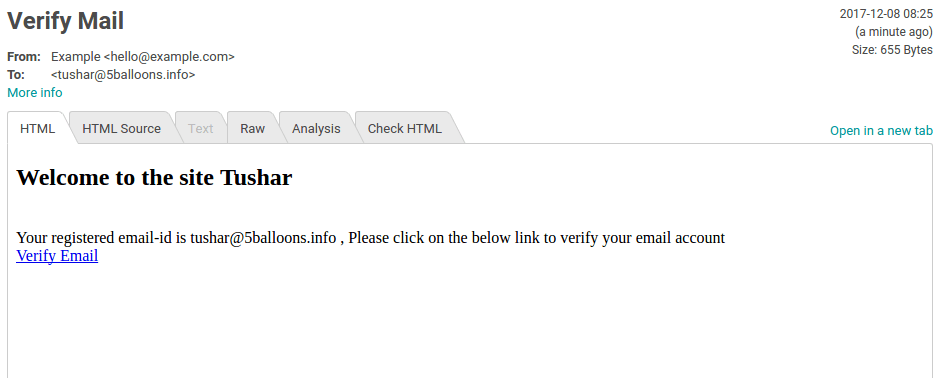
Let’s go ahead and create the view file to to send verification email. Create a new file verifyUser.blade.php under resources / views / emails and put following contents into it.
<!DOCTYPE html>
<html>
<head>
    <title>Welcome Email</title>
</head>

<body>
<h2>Welcome to the site {{$user['name']}}</h2>
<br/>
Your registered email-id is {{$user['email']}} , Please click on the below link to verify your email account
<br/>
<a href="{{url('user/verify', $user->verifyUser->token)}}">Verify Email</a>
</body>

</html>
Now since we have necessary code ready to send verification email to user account. Let’s modify our Registration class to send emails.
Open RegisterController.php class located under App / Http / Controllers / Auth and modify it’s create method as follows
    protected function create(array $data)
    {

        $user = User::create([
            'name' => $data['name'],
            'email' => $data['email'],
            'password' => bcrypt($data['password']),
        ]);

        $verifyUser = VerifyUser::create([
            'user_id' => $user->id,
            'token' => str_random(40)
        ]);

        Mail::to($user->email)->send(new VerifyMail($user));

        return $user;
    }
We are generating a new random token and storing it in the verify_users table against the user_id, After that we use the Mail facade to send send VerifyMail to the user’s email address.
Verify User Functionality (Route and Controller Method)
Let’s go ahead towards coding functionality of user verification, i.e. the code that will be executed when user clicks on the link sent to his email account.
Create a route entry, It will be better if you keep it together with your Authentication routes.
Route::get('/user/verify/{token}', 'Auth\RegisterController@verifyUser');Since the functionality is related to User Registration we will create a new method verifyUser in RegisterController.php
    public function verifyUser($token)
    {
        $verifyUser = VerifyUser::where('token', $token)->first();
        if(isset($verifyUser) ){
            $user = $verifyUser->user;
            if(!$user->verified) {
                $verifyUser->user->verified = 1;
                $verifyUser->user->save();
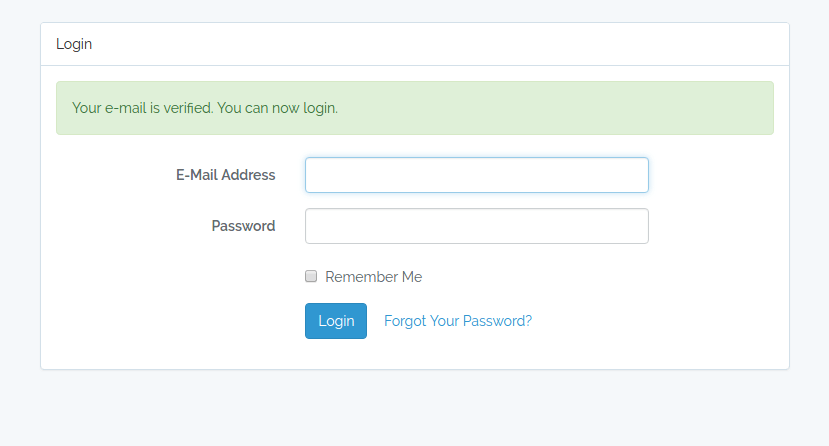
                $status = "Your e-mail is verified. You can now login.";
            }else{
                $status = "Your e-mail is already verified. You can now login.";
            }
        }else{
            return redirect('/login')->with('warning', "Sorry your email cannot be identified.");
        }

        return redirect('/login')->with('status', $status);
    }
verifyUser method accepts a token from the url and it goes ahead and finds the user that is associated with that token. It confirms that the user exists and is not verified yet and then goes ahead and changes the verification status in the database.
Various status and warning massages are clubbed when redirecting the user to display on the view file.
Restricting Un-Verified User Access
We now have our email verification and user account activation process in place, But there is just one more important thing that needs to be done before we can mark this complete.
We should not allow unverified user’s to access the application pages until they are verified.
Thus we need to apply checks at two places
- Just after user Login
- Just after new user Registration
Modify LoginController.php and override the authenticated method from AuthenticatesUsers
    public function authenticated(Request $request, $user)
    {
        if (!$user->verified) {
            auth()->logout();
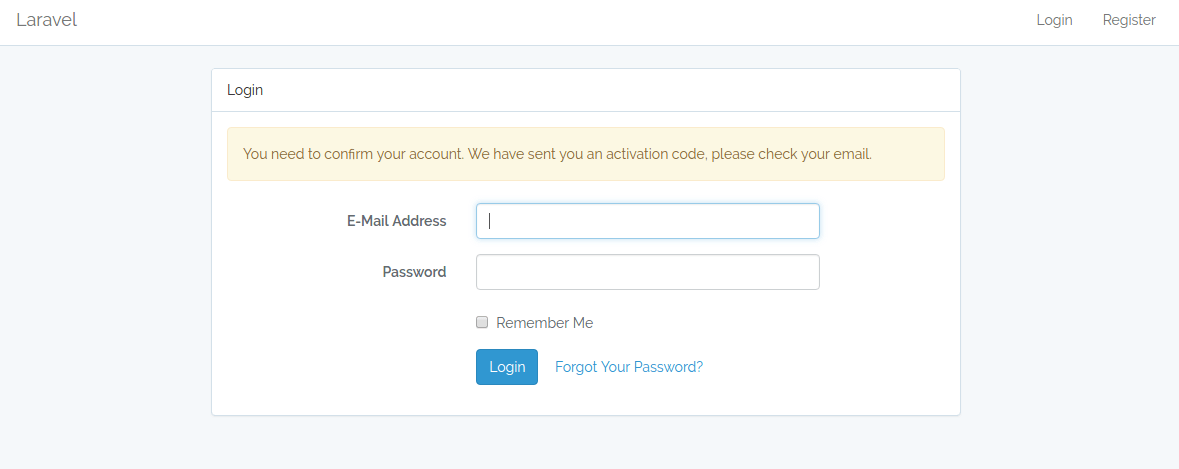
            return back()->with('warning', 'You need to confirm your account. We have sent you an activation code, please check your email.');
        }
        return redirect()->intended($this->redirectPath());
    }
authenticated method is executed just after the user is authenticated. We will override this and will use this to check if user is activated. If not we will sign-out the user and send back to login page with warning message.
Modify RegisterController.php and override the registered method from RegistersUsers
    protected function registered(Request $request, $user)
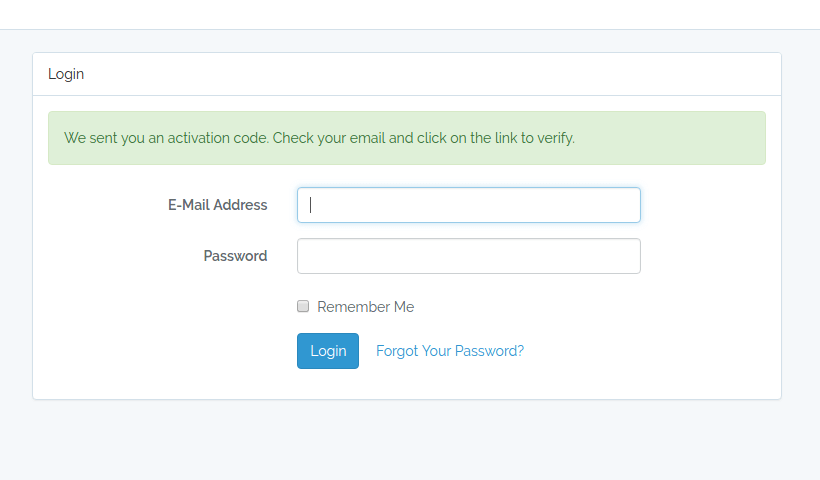
    {
        $this->guard()->logout();
        return redirect('/login')->with('status', 'We sent you an activation code. Check your email and click on the link to verify.');
    }
registered method is executed just after the user is registered into the application, we will override and modify this to sign-out the user and send him back to login with status message.
Last we need to modify our login.blade.php file which is located under resources / views / auth . Add the following snipped to display the appropriate status messages.
                    @if (session('status'))
                        <div class="alert alert-success">
                            {{ session('status') }}
                        </div>
                    @endif
                    @if (session('warning'))
                        <div class="alert alert-warning">
                            {{ session('warning') }}
                        </div>
                    @endif
Code Repo
Once you have implemented the Email Verification and Account Activation Functionality, You might find these tutorials useful to extend your Laravel Authentication Functionality.
- Change Password Functionality with Laravel 5.5 Authentication
- Two Factor Authentication (Google2FA) with Laravel 5

